Installing a fireplace insert can greatly enhance your home’s heating efficiency while adding a cozy ambiance to your living space. However, the process requires careful planning, the right tools, and a thorough understanding of the installation steps to ensure safety and optimal performance. This guide will walk you through how to install a fireplace insert with clear instructions, tips, and considerations to help you get the best results.
Why Install a Fireplace Insert?
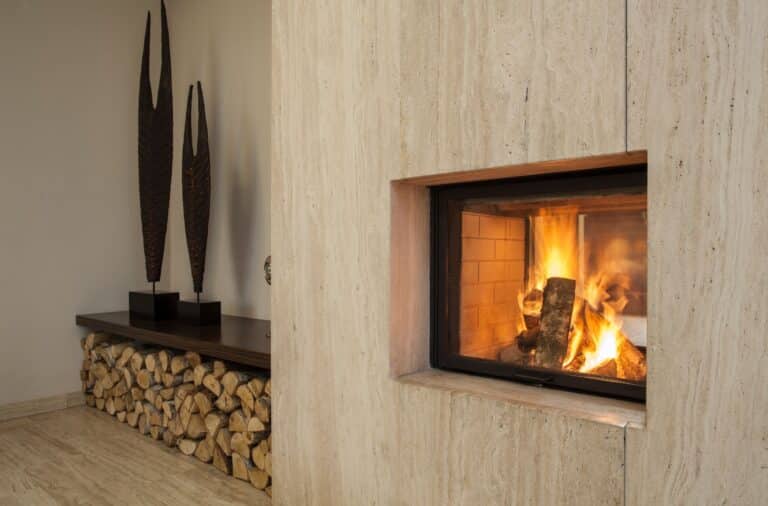
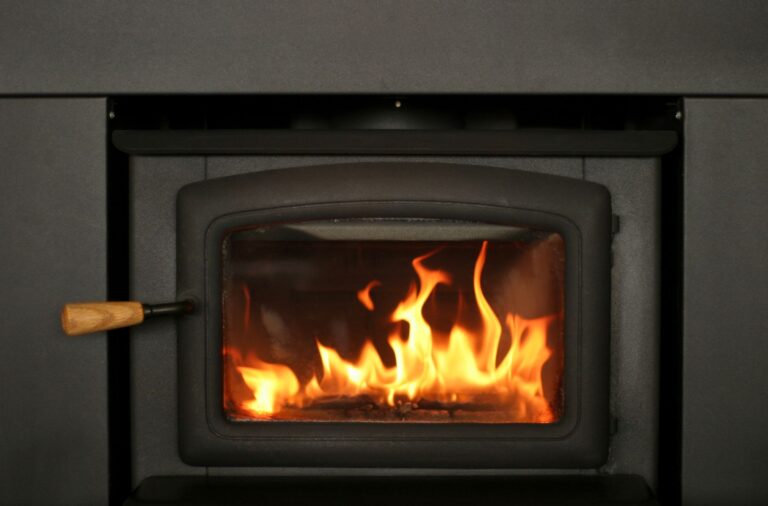
Before diving into the installation process, it’s important to understand why a fireplace insert is a worthwhile investment. A fireplace insert improves the heating capacity of your existing fireplace by trapping and circulating warm air more efficiently. It can also reduce energy costs by providing an alternative heating source that lessens the burden on your central heating system. Additionally, inserts come in various styles and fuel types, including wood, gas, and electric, allowing you to choose the best fit for your home’s needs.
Safety Considerations Before Installation
When learning how to install a fireplace insert, safety should be your top priority. Improper installation can lead to dangerous situations such as carbon monoxide poisoning or fire hazards. Here are some key safety tips to keep in mind:
- Clearance Requirements: Ensure there’s proper clearance between the fireplace insert and any combustible materials, such as wood framing or furniture.
- Chimney Inspection: Verify that the chimney and flue are in good condition and appropriately sized for the insert you plan to install. Cracks or blockages must be addressed before proceeding.
- Carbon Monoxide Detectors: Install carbon monoxide detectors near the fireplace and throughout your home to monitor for any leaks.
- Professional Inspection: Even if you plan to do the installation yourself, having a certified professional inspect the setup before first use is advisable to ensure everything is in order.
- Follow Manufacturer’s Instructions: Always adhere to the manufacturer’s guidelines for installation, operation, and maintenance.
Tools and Materials Needed
Gathering the right tools and materials beforehand will make the installation process smoother. Here’s a list of what you’ll need:
- Fireplace Insert: Choose an insert that fits your fireplace’s dimensions and meets your heating needs.
- Vent Liner Kit: A stainless steel vent liner ensures safe venting of smoke and gases.
- Caulking Gun and High-Temperature Silicone Sealant: These help in sealing gaps and ensuring airtight connections.
- Angle Grinder: For removing any obstructions or protruding bricks in the fireplace.
- Pipe Wrenches and a Half-Inch Cap: To safely cap off any existing gas lines.
- Screwdriver, Hammer, and Nut Driver: Basic tools for assembling and securing the insert.
- Rope and Pulling Cone: To guide the vent liner through the chimney.
- Shop Vacuum: To clean out debris from the fireplace and chimney before installation.
- Protective Gear: Gloves, safety glasses, and a dust mask for your protection during the installation.
Preparing the Fireplace for Insert Installation
- Inspect and Clean the Fireplace
- Begin by inspecting your existing fireplace for any signs of damage or wear. Repair any cracks or loose bricks before proceeding. Clean out any ash, soot, or debris using a shop vacuum to ensure a clean surface for installation.
- Remove Obstacles
- Use an angle grinder to remove any protruding bricks or obstacles that might interfere with the insert. Ensure the fireplace floor and walls are even, allowing the insert to sit level and secure.
- Install a Power Outlet
- If your insert comes with a convection fan, you’ll need to install a 110-volt power outlet inside the fireplace. Make sure the outlet is grounded and installed according to electrical codes.
- Cap Off Gas Lines
- If there’s an existing gas line, use pipe wrenches to cap it off securely with a half-inch cap. This step is crucial to prevent any gas leaks, especially if you’re switching from a gas fireplace to a wood-burning insert.
Installing the Vent Liner
- Prepare the Chimney
- Before installing the vent liner, ensure the chimney is clear of debris and obstructions. If necessary, use a chisel to remove any bricks or blockages. For chimneys with an existing damper, you may need to remove it if it obstructs the liner’s path.
- Insert the Vent Liner
- Attach a pulling cone to one end of the vent liner and secure a rope to the cone. Drop the rope down the chimney and use it to guide the liner through the chimney. Once the liner is in place, trim it to the appropriate length.
- Seal and Cap the Chimney
- Apply high-temperature silicone sealant around the top edge of the flue tile, then install the chimney cap. This step ensures that the liner is securely in place and prevents moisture or debris from entering the chimney.
Installing the Fireplace Insert
- Position the Insert
- Carefully slide the fireplace insert into the prepared opening. Ensure it’s centered and level within the fireplace. This might require some adjustments, so take your time to get it right.
- Connect the Vent Liner
- Inside the fireplace, connect the vent liner to the insert using an adapter elbow. Secure the connection with a nut driver to ensure an airtight fit. Apply more high-temperature silicone sealant if necessary to prevent any leaks.
- Plug in the Insert
- If your insert has a convection fan, plug the power cord into the outlet you installed earlier. Ensure the cord is safely tucked away to prevent any damage during use.
- Install the Surround Panel
- The surround panel is the finishing touch to your installation. It not only complements your room’s decor but also seals any gaps between the insert and the existing fireplace opening. Secure the surround panel according to the manufacturer’s instructions.
Final Safety Checks
Once the insert is installed, perform a final safety check:
- Test the Insert: Light a small fire to test the insert. Check for any smoke leaks or issues with the venting system.
- Monitor for Carbon Monoxide: Keep an eye on your carbon monoxide detectors to ensure there are no leaks.
- Inspect the Surround: Ensure the surround panel is securely attached and that there are no gaps that could allow heat or smoke to escape.
Maintaining Your Fireplace Insert
Regular maintenance is key to ensuring your fireplace insert remains safe and efficient:
- Annual Inspections: Have your insert and chimney inspected annually by a certified professional.
- Clean the Chimney: Regular chimney cleaning is essential to prevent creosote buildup, which can lead to chimney fires.
- Check the Vent Liner: Periodically check the vent liner for any signs of wear or damage, and replace it if necessary.
Fix Or Clean: Your Trusted Partner for Fireplace and Chimney Services
When it comes to installing or maintaining your fireplace insert, it’s important to work with professionals who understand the complexities involved. At Fix Or Clean, we specialize in fireplace insert installations, chimney inspections, and maintenance services to ensure your home stays warm and safe all year round. Our team of certified experts is committed to providing top-quality service, from the initial installation to regular maintenance checks.
By choosing Fix Or Clean, you can rest assured that your fireplace insert will be installed correctly and efficiently, maximizing its performance and longevity. Don’t take chances with your home’s safety—trust the experts at Fix Or Clean to get the job done right. Contact us today to schedule your consultation or service appointment.
Conclusion: The Benefits of a Properly Installed Fireplace Insert
Learning how to install a fireplace insert is an investment in your home’s comfort, safety, and energy efficiency. By following the steps outlined in this guide, you can ensure a successful installation that provides warmth and beauty to your living space for years to come.
Whether you’re a seasoned DIYer or new to home improvement projects, taking the time to install your fireplace insert correctly will pay off in the long run. Not only will you enjoy the aesthetic and functional benefits, but you’ll also have peace of mind knowing your home is safe.
